Managing machine learning projects can be a daunting task without the proper tools to assist you. As with traditional software engineering, versioning is an essential part of the machine learning workflow. However, unlike traditional software engineering, machine learning involves massive files, consisting of datasets and model artifacts, that current version control systems do not support. In addition, machine learning experiments are evaluated by a number of metrics that need to be tracked. In this blog post, I will walk you through my personal machine learning workflow.
Premise
doc1.docx, doc2.docx, doc-final.docx, doc-final1.docx, doc-final2.docx, doc-final-na-talaga.docx
Do these look a bit familiar to you? This was how I tracked my documents, homeworks, and papers back when I was still studying and I’m sure, that this is also true for some of you who are reading. Each revision to the document would constitute a new filename and so on. Back in my thesis days, I would also track my machine learning experiments in the same manner, by non-descriptive filenames as seen below:
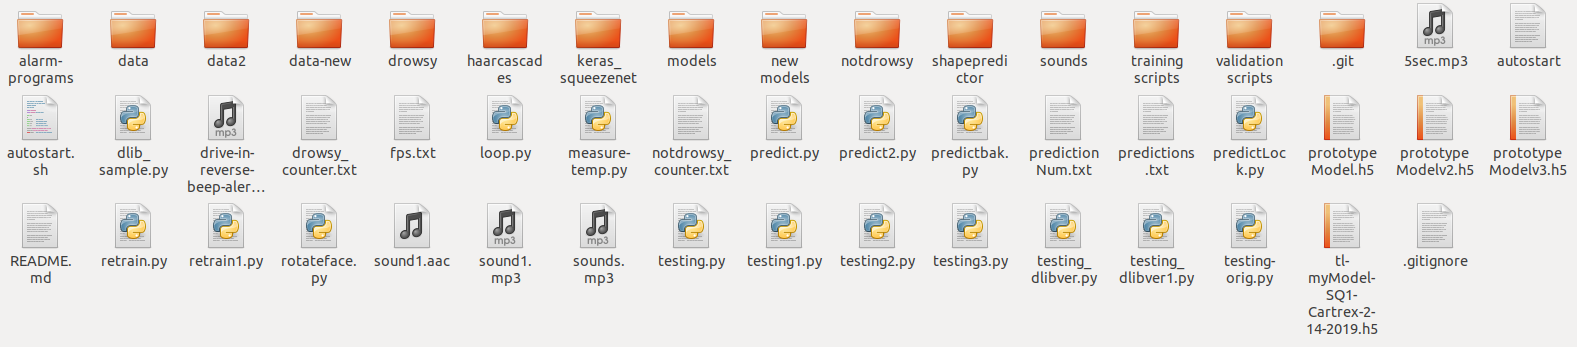
Each model would have a filename that has a date and the model that has the latest date was the latest and greatest. In addition, each dataset version would have a different filename and the dataset that had the word “new” in its filename would be the most effective dataset to train on.
Obviously, this isn’t really an organized way of handling machine learning projects. I would often lose track of filenames and would have to redo quite a number of experiments. My project directory would be a mess with files that I don’t even remember creating.
To track my machine learning experiments, I used tensorboard. Although, tensorboard is intuitive and easy to use, it relies on log files, that you have to load, to view the results and metrics of your training experiments. It would be more convenient to have a central dashboard for your experiments to have an overview of their comparison with each other.
Solution
With the ever-changing and evolving technology landscape, new tools have been created to supplement these changes. A decade ago, deep learning was unheard off, and remained a niche topic among researchers but now it has become a mainstream technology that every company seems to want to get a hand on. With this, new tools have been created for those creating these deep learning models.
Data Version Control
Data Version Control is an open-source version control system specifically made for Machine Learning. Its aim is to make ML experiments reproducible by versioning the datasets and artifacts of your experiments. It is built to handle the large files that compose a machine learning project and can integrate seamlessly with git and a variety of remote or local storages. As stated in their website, “DVC guarantees that all files and metrics will be consistent and in the right place to reproduce the experiment or use it as a baseline for a new iteration.”

Weights and Biases
Weights and Biases is a machine learning experiment tracking system that helps data science and machine learning teams track their training expermients and visualize model performance. It is built to be framework agnostic, meaning it can integrate with any framework. In addition, you can log and explore just about anything in your experiment, from logging hyperparameters to visualizing the gradients of your model. It also, has a nice feature of creating your own graphs in the dashboard to visually compare your models better.
Installation
Data Version Control
For more information, visit https://dvc.org/doc/install. In this section, I will lay out the steps I used for installing dvc on my Linux machine.
1) Install dvc by pip as follows:
pip3 install dvc
According to the website, depending on the type of the remote storage you plan to use, you might need to install optional dependencies: [s3], [azure], [gdrive], [gs], [oss], [ssh]. Use [all] to include them all.
Weights and Biases
1) Install Wandb by pip as follows:
pip3 install wandb
Register to Weights and Biases at their website.
Setup
First, let’s setup our project directory.
1) Initialize our project folder to be a git repository.
git init
2) Add our training scripts/notebooks, our dataset directory and artifiacts directory.
Note: The datasets directory will contain all of our data to train on and the artifacts directory will contain our models and model checkpoints. The artifacts directory is empty for this step. In addition, I named the datasets directory as data and the artifacts directory as models.
3) Initialize dvc on the directory and commit with git.
dvc init
git commit -m"Initialize Git and DVC"
4) Add a dvc remote storage where dvc will store your data. We will add a local remote and commit our changes.
Note: In our current configuration, we can already start using dvc, however if you plan to share your data and models, adding a remote storage is advisable. To add other remote storages, visit here for additional configurations.
dvc remote add -d naruto-remote /tmp/naruto-data-store
git commit -m"DVC remote added"
Additional Note: Some usefull commands:
dvc remote list
dvc remote add -d <name> <path>
dvc remote remove <name>
5) Now, to track our datasets(I named this "data") and artifacts(I named this "models") directory, do a dvc add, git add and commit to git. This will place the directories to our gitignore file so it won’t be tracked in git and dvc will make a metafile for each directory that serves as its basis for version controlling each directory. Then, we push to our remote dvc storage.
dvc add data/
dvc add models/
git add .
git commit -m"Base dataset"
git tag -a "Base-Dataset" -m"This is our base dataset, no models included."
dvc push
Note: If you have a remote git repository like github, you can do git push to reflect your changes to the remote.
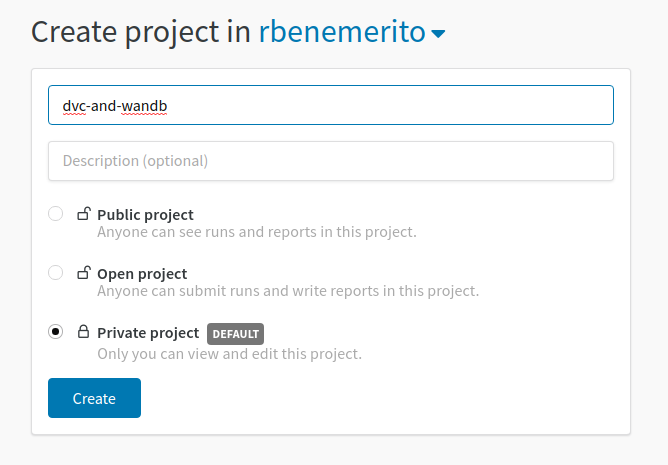
6) Go to weights and biases and create a project.
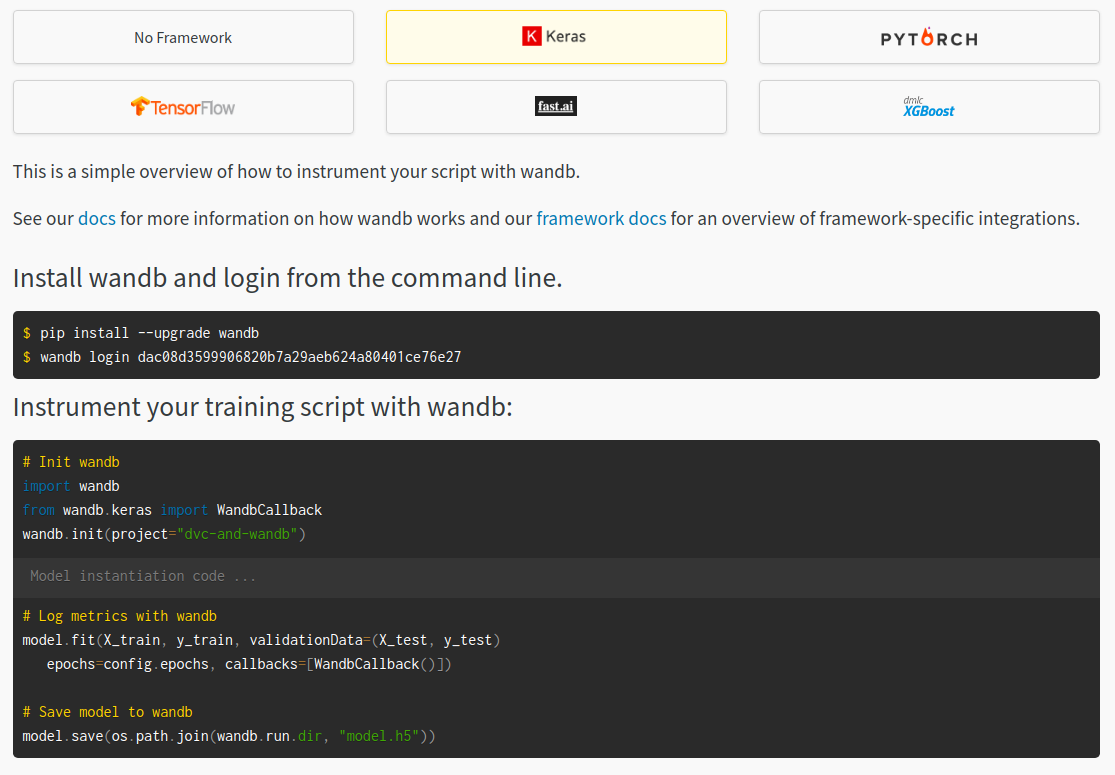
7) Lastly, select your framework of choice. For the purposes of this tutorial, I’ll use Keras.
Workflow
Now let’s walkthrough my previous machine learning project Naruto Hand Seals Classification found here.
First Experiment
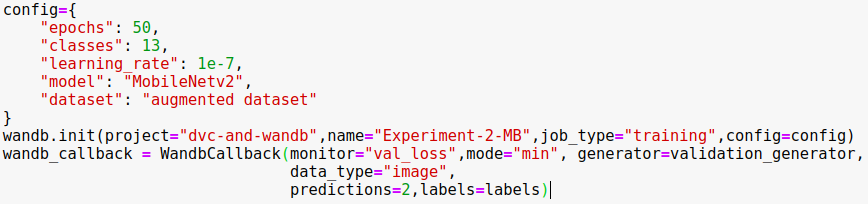
1) Modify our training script to include the Wandb configuration as follows:
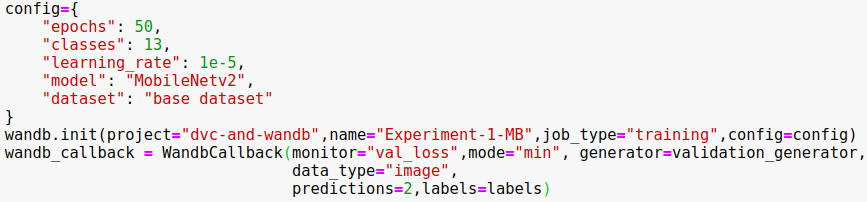
This will be our experiment configuration. You can add additional fields to keep track off here.
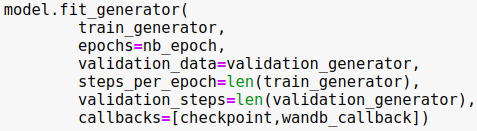
Don’t forget to include the wandb callback to your fit function. In this case, I used Keras Image Data Generators so I used fit_generator
2) Execute the training script and view your weights and biases dashboard.
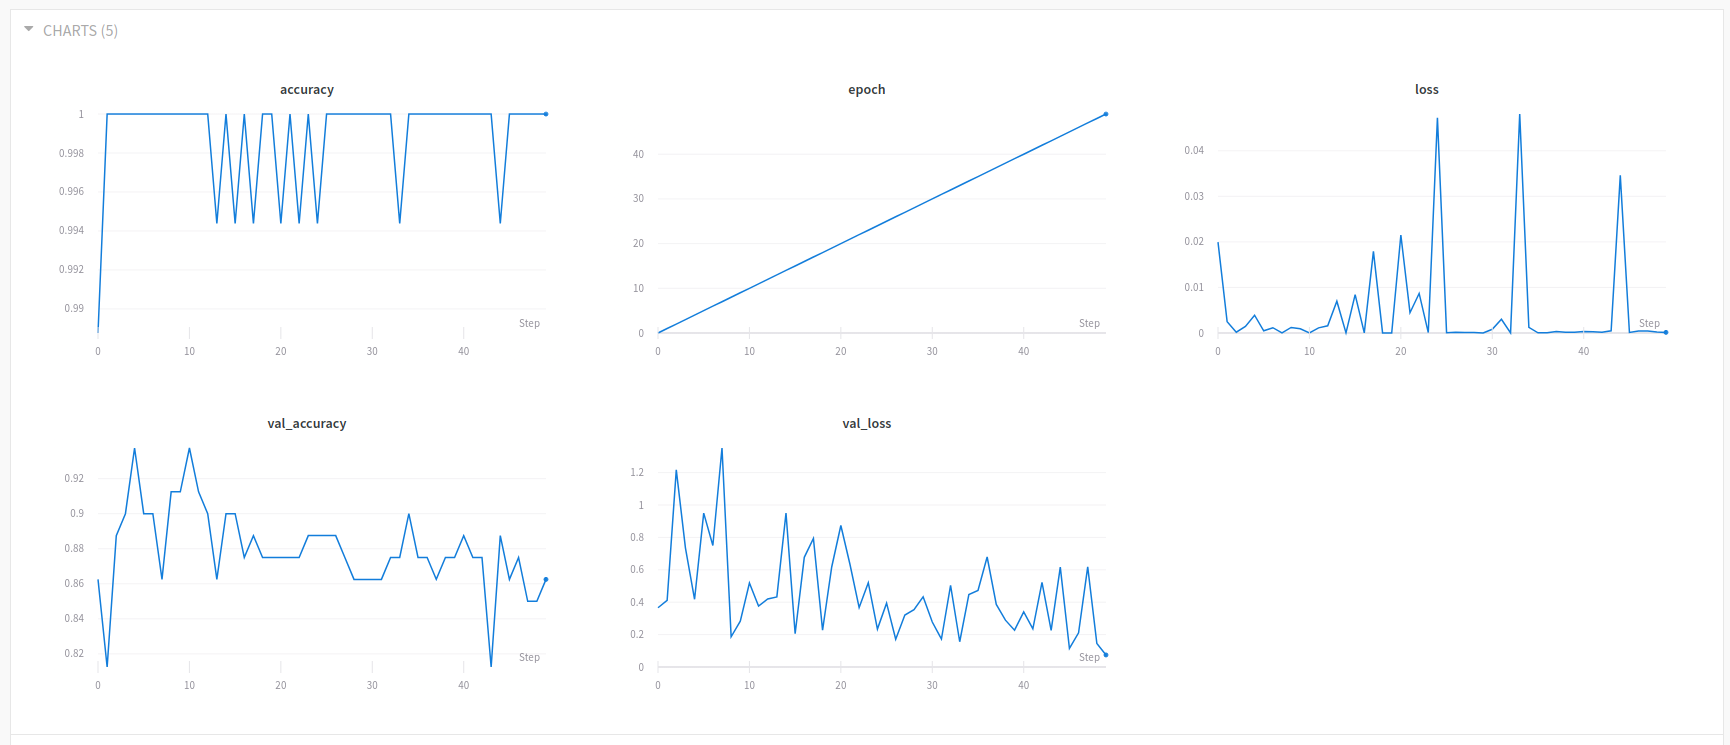
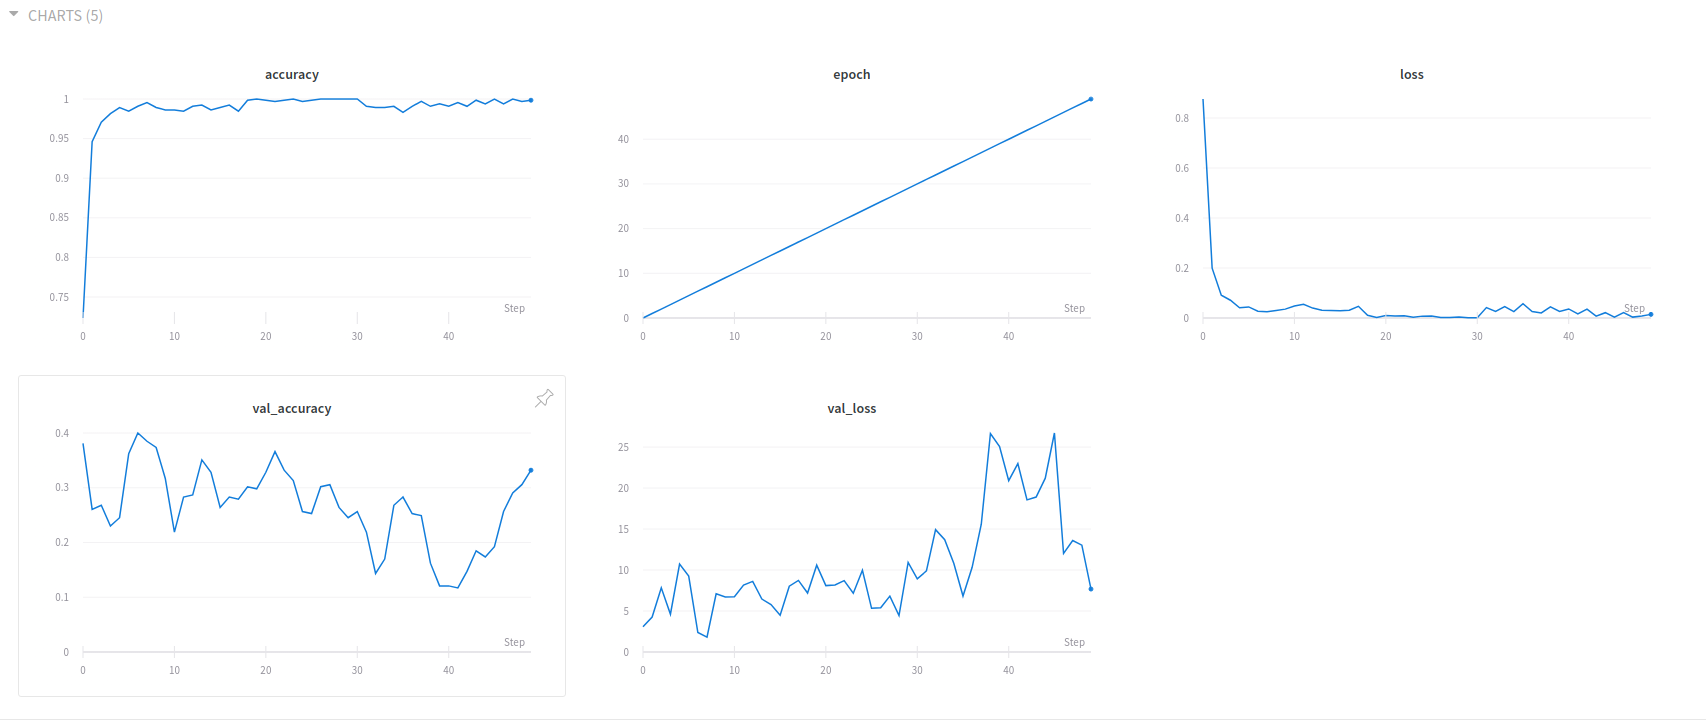
This is our experiment 1 dashboard, where we can see the progress of our training with accuracy, loss, validation accuracy and validation loss visualized in a graph.
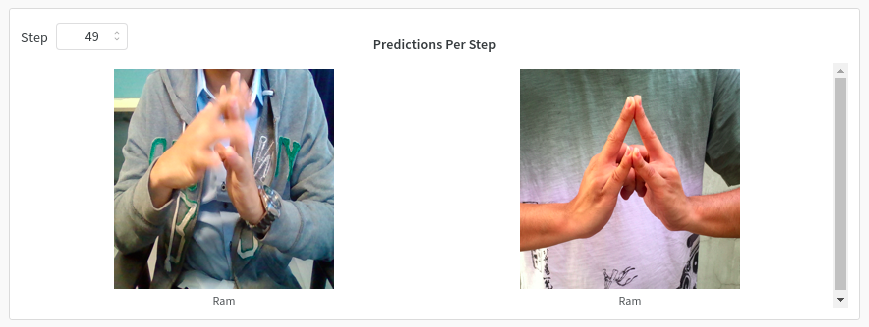
To virualize the predictions at each step do the following:
a) Click on add visualization.
b) Select Image.
c) Name the visualization and click ok.
3) Upon finishing training the model, add our trained models to DVC by:
dvc add models/
git add .
git commit -m"Experiment 1-MobileNet"
git tag -a "Experiment-1-Mb" -m"MobileNet trained on base dataset."
dvc push
4) Done!
Second Experiment
1) Add our new and imroved dataset to the dataset directory. You have the option to delete our previous trained model if you like. Don’t worry, dvc has a copy of it.
rm -r models/*
dvc add data/
git add .
git commit -m"Dataset Augmented"
git tag -a "Dataset-Augmented" -m"Augmented Dataset"
dvc push
2) Modify our training script to include the Wandb configuration as follows:
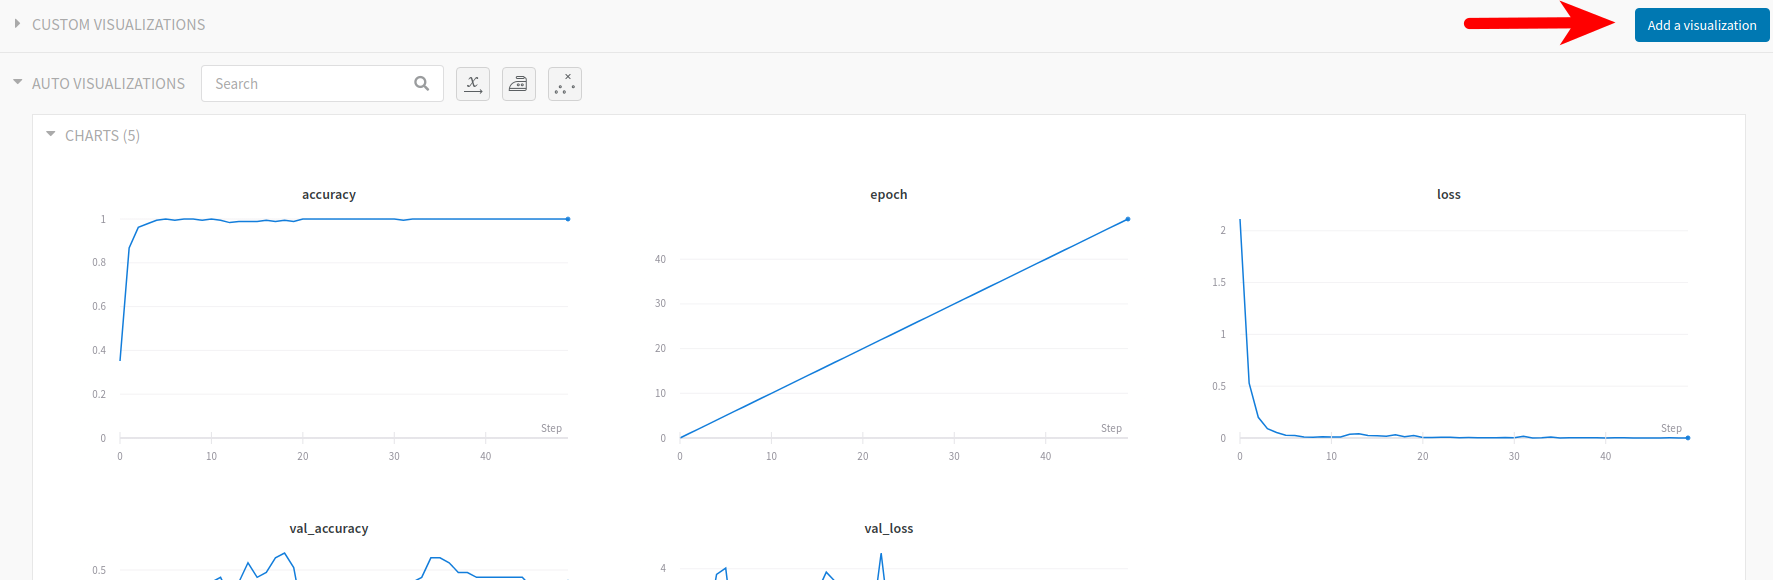
3) Execute the training script and view your weights and biases dashboard.
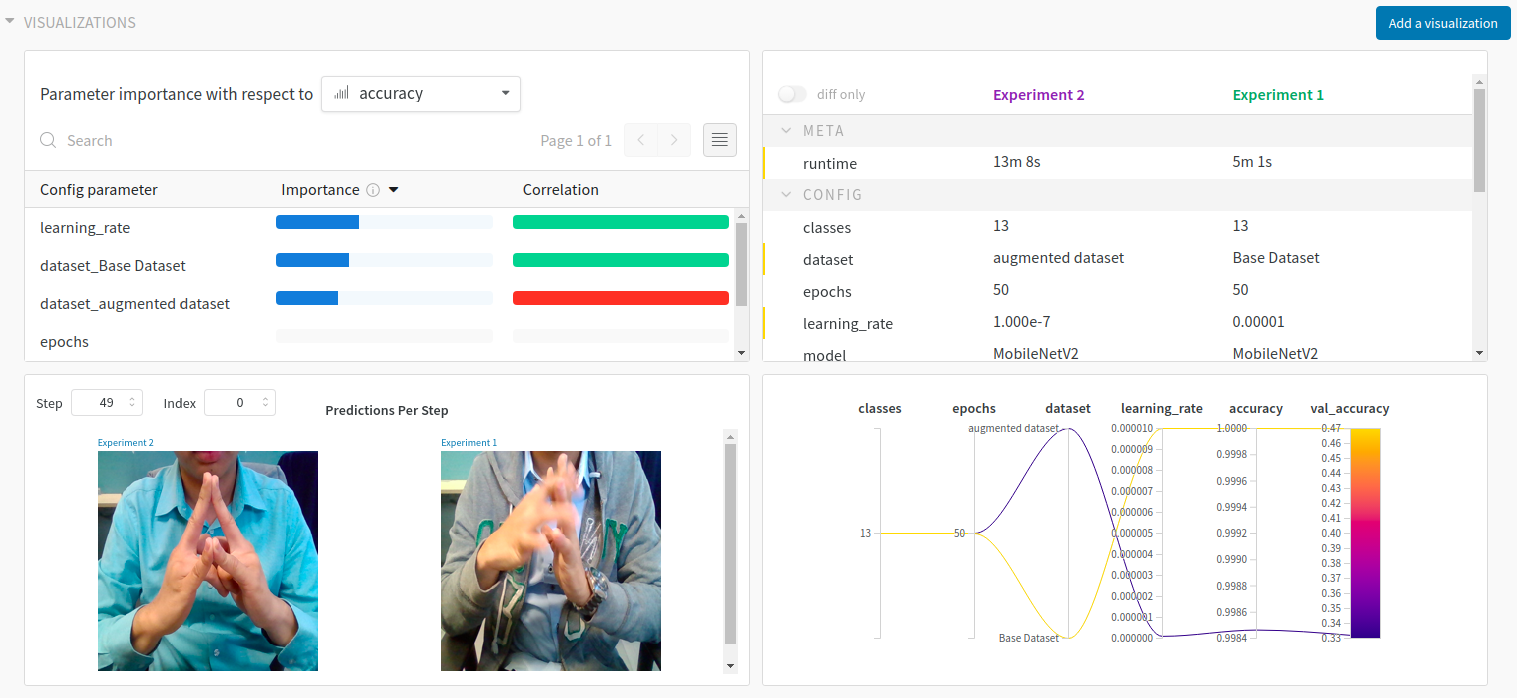
Now, going back to your experiment runs, you can now see both experiments 1 and 2.

You can also add custom visualizations to find correlations between hyperparameters and metrics or further compare experiments with each other.
4) Upon finishing training the model, add our trained models to dvc by:
dvc add models/
git add .
git commit -m"Experiment 2-MobileNet"
git tag -a "Experiment-2-Mb" -m"MobileNet trained on augmented dataset."
dvc push
5) Done!
Rollback to Previous Dataset/Experiment
Now, for example, we make a mistake with the dataset and we want to rollback to the previous version do the following:
1) Checkout git to the tag name of the dataset you want to rollback to.
git checkout <tag name>
2) Checkout dvc.
Note: Notice that we didn’t need to supply a tag name. This is because dvc uses the metafiles that we’ve created and changed with each dvc add. Since the metafile is version controlled by git, it has been reverted to its state with respect to the checked out tag.
dvc checkout
3) Done! Your dataset has been reverted. This is also the same process for recovering the models resulting from each experiment. Just git checkout the appropriate tag name of the experiment and do dvc checkout.
Conclusion
With technology constantly evolving, new tools have been created to support those who are enabling this evolution. Deep learning and machine learning have been niche topics a decade ago and now, they are part of the mainstream (or in the process of). With this, existing tools are no longer capable of supporting the creation of these new technologies. Data Version Control and Weights and Biases are two of the new tools that help enable data scientists, machine learning practitioners and researchers in creating and managing their machine learning and deep learning experiments. Data Version Control allows for experiment reproducibility by version controlling the large datasets and model artifacts that come with machine learning and deep learning. On the other hand, Weights and Biases provides a central dashboard for visualizing and exploring almost every aspect of your machine learning experiment, from the basic hyperparameter and evaluation metrics to the gradients and predictions of your models. This is it for now, till the next post!